INSTALLING NATURAL STONE FLOORING

Installing natural stone flooring can be daunting. Therefore, we’ve pulled together a handy guide to help with the installation of your natural stone floor.

Natural stone floor tiles from Full Circle Ceramics are naturally quarried products. Therefore, each paving unit, and each floor, will have its own unique character and appearance. Sizes and thicknesses given are approximate and variations in colour will be apparent.

Tile Delivery and Storage

Please ensure that suitable access is available. The products will arrive on 18-26 tonne vehicles (this is approximately the size of a fire engine). The driver will endeavour to offload the paving as close as possible to where you would like them. It is essential that we are informed of any access issues (e.g. narrow lanes, overhead restrictions, difficult site conditions, restricted parking). If we do not have prior warning we cannot be held responsible for not offloading.

The paving, in the main, will arrive on shrink wrapped pallets approx 14m2 to 39m2 per pallet (dependent on stone type and thickness). Please ensure that the goods are checked and any items that may have been omitted from the delivery are reported. This ensures that replacements are dispatched in a timely manner in order to avoid delays.

Packaging may experience condensation, which can damage the product surface. If extreme temperature changes are anticipated, remove outer plastic packaging and ensure stones are protected from adverse weather.

Before installation of the tiles, transfer the tiles to the area in which they are to be laid to allow them to acclimatise overnight at room temperature.

Radiators and heat sources in the room including range cookers should be turned off during the laying and drying out process. This will prevent rapid drying which may lead to grout shrinkage and hairline surface fissures. However, a minimum background temperature of 15°C will be required for sealing.

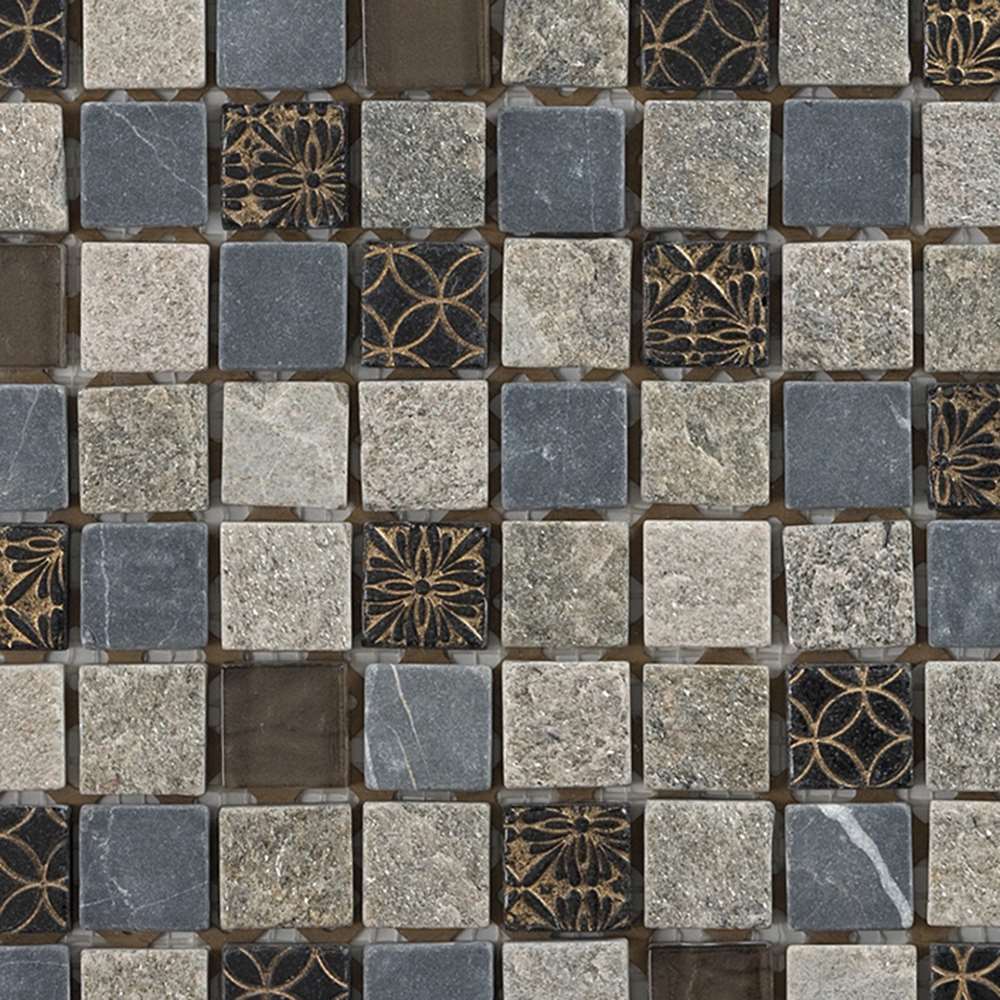
Roma Mosaic Tiles

Preparation Of Internal Areas and Paving Stones

The type of surface the tiles have to be fixed to will determine the choice of tile. The following table shows the weight limits for various substrates. This is in accordance with the relevant information contained within BS 5385 – Wall and floor tiling.

  • Ensure the floor on which the paving is to be laid on is thoroughly clean and free of dust and loose debris.
  • Any bitumen on existing floors should be removed entirely or covered with a levelling compound.
  • Remove all loose and friable material from the back of the stones.
  • It is recommended that the floor sub-base is primed prior to laying the paving products.
  • A few flagstones may have small chips and blemishes. These are generally used for cuts. You should allow 5% extra on your room measurements for cuts to cover reasonable breakages or mishandling.
  • When the stones are completely dry, the surface of the stones should be saturated with at least one coat of Lithofin MN Stain Stop prior to laying and grouting.
  • Cutting should be done with a diamond cutter.
  • As a general rule, we do not recommend that our stones are fixed onto glazed, vinyl or other resilient surfaces.

Note: New screeds should be properly cured and allowed to air dry for at least 3 weeks before the stones are laid. New concrete bases should be allowed to dry for at least 6 weeks before the stones are laid. The above drying times should be extended in low temperatures/humid or poorly ventilated conditions as these will delay drying.

Please take the above into consideration when installing natural stone flooring.

Installation and Laying – Movement Joints

  • To counteract movement stresses, which can result in tiles cracking and/or debonding, a movement joint should be provided around the perimeter of the room.
  • A gap no less than 6mm wide and 6mm deep or the depth of the tile should be left at the junction between walls and the floor. This should be filled with silicone sealant at the end of the job, or if being covered with skirting boards or kitchen units may be left open.
  • In large floor areas, intermediate movement joints should be provided at 8 to 10 metre intervals in both directions.
  • We would normally recommend the fitting of an anti-fracture membrane in order to reduce the risk of floor cracking due to movement in the floor.
  • Movement joints should be fitted in accordance with the recommendations as stated in BS 5385 – Wall & Floor Tiling.

Laying The Adhesive

Please Note: Site conditions can vary enormously. Therefore, this can therefore affect the quantity of adhesive required.

  • Ensure the paving units have had at least one surface saturation of Lithofin MN Stain-Stop before installing natural stone flooring. This will protect the surface of the stones when handled. Please note the stone can show honing marks when held against the light. Applying Lithofin MN Stain-Stop should cause these to fade.
    Important: Ensure you achieve an even coverage of 5m2 per litre of Lithofin MN Stain-Stop. This may mean applying more than one coat.
  • Never lay on ‘dabs’ of adhesive.
  • Paving can be laid on solid floors and screeded floors with underfloor heating using flexible thick-bed adhesive.
  • Use a thickness of 3-5mm (4-8mm) of flexible thick-bed adhesive dependent on stone type. Adhesives generally have a working time of 30 minutes, so it’s important not to mix more than can be used in this time.
  • Fix whole paving stones first. Leave any cut stones around the perimeter of the room, or around the fixtures, until last.
  • Leave a joint width of 3-20mm between each stone, dependent on stone type.
  • Using a solid-bed notched trowel, comb out a full bed of adhesive, making sure that the adhesive is trowelled out in straight lines.
  • Double bonding is necessary, so both the floor and the back of the stone must be covered in adhesive.
  • Using a twisting motion, firmly push the stones into place (positioning the stone, which can be adjusted up to 10 minutes after laying). Do not attempt any adjustment after this time as this will seriously weaken the bond.
  • A spirit level is essential to ascertain that the finished floor is level.
  • Ensure at least 3 hours have elapsed before allowing light foot traffic on the stones laid in the hardening adhesive.

Laying On A Screeded Floor With Under Floor Heating Pipes

  • Follow the recommendations in ‘laying in adhesive’, and use flexible grout.
  • Any required expansion joints in the screed sub floor and doorways must be continued through the adhesive and stone flooring.
  • Expansion gaps/joints will be required around the perimeter of the room, across doorways and also in floors larger than 25m2.
  • It is important that if the stones are to be installed with adhesive on a newly laid screed, the new screed is allowed to cure and dry thoroughly as recommended by the manufacturers of the heating system.
  • The cured and dried screed should be heated up at the recommended rate and held at the operating temperature for sufficient time for the screed to dry to the operating moisture content.
  • The heated system should be turned off or in cold weather turned down to no more than 15°C before installing natural stone flooring.

Laying On A Screeded Floor With Under Floor Heating Mat

  • As above use a flexible grout and ensure the screed is thoroughly dry.
  • The mat can be covered by one layer of a pourable thick-bed adhesive/self levelling compound and allowed to dry before laying the stones. Alternatively, you can lay adhesive and stones in one operation.
  • Required expansion joints in the screed sub floor and doorways must be continued through the adhesive and stone flooring.
  • Expansion gaps/joints will be required around the perimeter of the room, across doorways and also in floors larger than 25m2.

Laying On Anhydrite Screeded Floor

  • The screed must be allowed to dry out and prepared as per the screed manufacturers recommendations. Generally anhydrite screeds should be allowed to dry at a rate of 1 day per mm of screed thickness for screeds of up to 40mm thickness and 2 days per mm for any additional thickness over 40mm to achieve a moisture content of no greater than 1% w/w or 75% Relative Humidity (RH).
  • The screed should be free from all surface contamination, dust and laitance (the surface should be lightly sanded and vacuumed).
  • The screed should be primed using progressively stronger coats of a primer bond. Initially apply a 1:4 parts water dilution. Then, when dry, follow with a 1:3 dilution applied at 90° to the first coat. If after these two coats the surface is still absorbent, apply a further coat at a 1:2 dilution and allow to dry.
  • Alternatively, allow the screed to dry to a moisture content of less than 2% by volume prior to preparing and priming as above.
  • Fix DITRA Matting to the screed using thick bed stone adhesive prior to fixing tiles.

Switching On Under Floor Heating After Installation

  • The adhesives and grouts must be allowed to fully cure before the under floor heating is switched on. Generally this must be done 14 days after the installation has been completed.
  • The heating is switched on to 5°C, progressively turning the heating up by 5°C every 24 hours up to 25°C, progressively reducing this by 5°C every 24 hours until 0°C is reached, after which the heating can be used as normal. Failure to do this will affect the grout and the adhesion of the tiles.

Laying On A Suspended Floor

The criteria to bear in mind here are that:

  • The floor must be able to take the weight of the stones – approx. 46kg per m2.
  • Any movement in the floor must be eliminated. Take into account the initial drying shrinkage of the timber and subsequent movements due to moisture changes, bearing in mind the type of heating for the building. The supporting timber floor should have adequate ventilation beneath.
  • In large floor areas there can be significant deflection of timber joists due to long spans or heavy loading. Provide a rigid base by using at least 12mm thick waterproof plywood screwed through the floorboards at 100-150mm centres. Prime the ply and allow to dry.
  • Alternatively, a strengthened insulation board can be supplied and used. Apply the flexible adhesive mortar with a trowel to form a layer on the dry, primed plywood surface.
  • Trowel out a straight ribbed bed of the adhesive mortar and butter the back of each stone with a thin layer of the adhesive immediately prior to placing the stone in the still wet and workable ribbed bed (floating and buttering technique).
  • The adhesive bed thickness should be a minimum necessary to solidly bed the stones and achieve a level finish.

Sealing

  • The room should be well ventilated during sealing and at a minimum temperature of 15°C.
  • Further coats of sealant may be applied to the whole floor for added protection or enhanced appearance.
  • This may be done once the grout is cured and the floor cleaned and dry and free of any dirt or loose particles. We recommend either Lithofin MN Stain-Stop of if a harder wearing surface is required Multi-Seal, which as a sheen finish.
  • Do not allow the sealant to puddle and remove surplus with a cloth.

Always remove cooking spills and red wine immediately with a clean damp cloth.

Note: The seals used act by blocking the capillaries in the stone, preventing seepage of the spilt liquids. However a spillage left overnight may penetrate the seal.

Grouting

  • Use wide joint grout or flexible grout with under floor heating. For suspended floors use wide joint grout mixed with an appropriate admixture.
  • We recommend you test a small area with the grout mortar selected to ensure it does not stain the edges of the stones.
  • Thoroughly mix grout to a consistent, smooth paste with the addition of clean water, following the manufacturers’ guidelines carefully. Make sure the recommended ratio of grout/water is followed. Too much water can produce a grout with a greater risk of shrinking, too little means the grout tends to crumble.
  • Grout will remain workable for approximately 45 minutes. DO NOT add further water.
  • Before grouting it is important to clean the stones thoroughly and slightly wet them afterwards.
  • The stone contains small holes which can be filled during grouting.
  • During grouting it is important to clean the tiles in order to avoid a cement film.
  • Draw a clean damp sponge across the surface of the stone to produce a grout that finishes about 1mm below the surface.
  • It is recommended that only small surfaces are grouted at a time.

Note: All the adhesives and grout mortars used to fix the stones should be mixed in accordance with the instructions given on the manufacturers’ product data sheets and bag instructions.

For more help and guidance on installing natural stone flooring, contact a local tile retailer.